
How to Litter Train a Kitten: Complete Step-by-Step
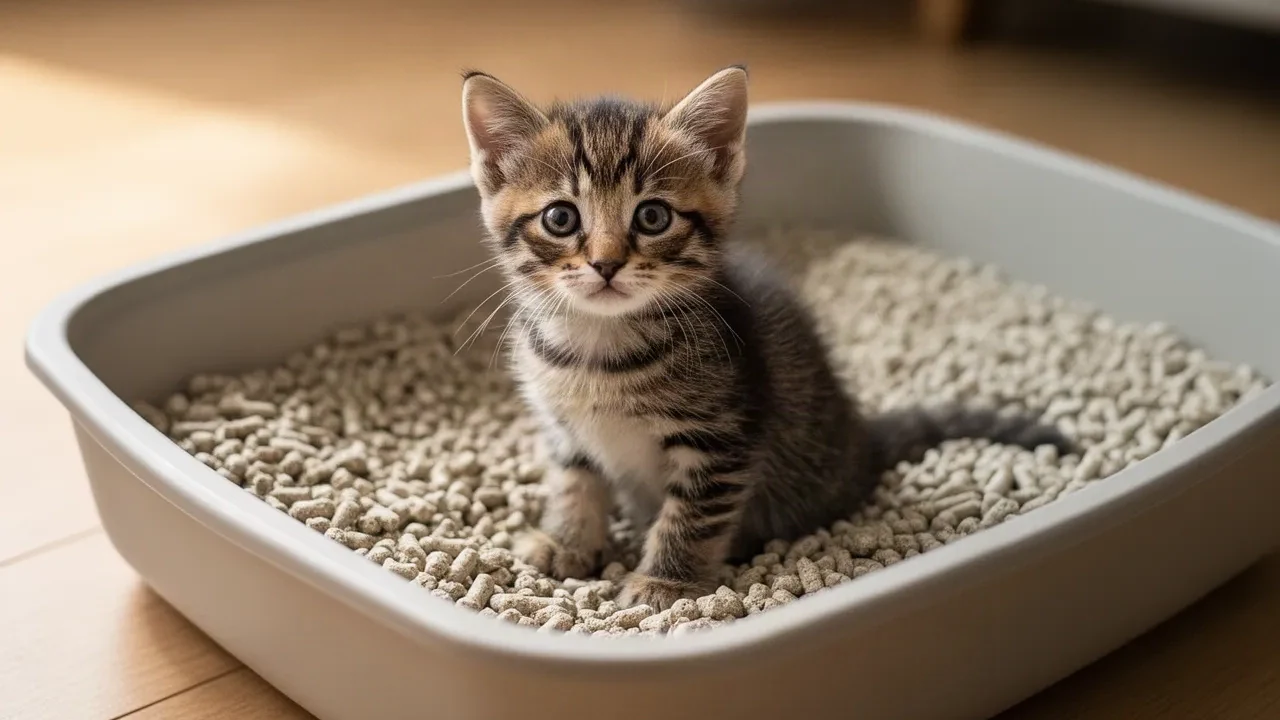
Litter training a kitten builds on their natural instinct to dig and bury waste, beginning around 3 to 4 weeks of age. Successful training involves providing an open, low-sided litter box with non-clumping substrate in a small room, and placing the kitten into the box 10 to 15 minutes after every meal and nap to capture their natural gastrocolic elimination reflex. If you are preparing for a new arrival, track developmental milestones with our Cat Age Calculator or follow our complete tutorial below for step-by-step training, substrate safety, and accident management.
The Biology of Kitten Elimination: When Reflexes Become Voluntary
Unlike puppies, kittens do not need to be taught why to use a litter box; they only need to be shown where it is. In the wild, cats bury their waste to hide their scent from larger predators and prevent prey animals from detecting their territory.
During their first three weeks of life, kittens cannot eliminate independently. They rely entirely on their mother’s tongue (or a foster caregiver’s warm, damp cotton ball) to stimulate the anogenital nerves that trigger urination and defecation.
Between 3.5 and 4.5 weeks of age, voluntary neuromuscular control of the bladder and bowel sphincters matures. Simultaneously, their developing brains activate an instinctual tactile response: when their paw pads feel a loose, granular substrate, they naturally squat, eliminate, and turn around to rake material over the deposit. Your goal is simply to channel this evolutionary drive into a safe indoor litter pan.
Choosing the Right Kitten Litter Box Setup
Setting up an appropriate physical environment is the most important step in litter training. Most early training failures stem from equipment designed for adult cats rather than tiny kitten bodies.
| Feature | Kitten Specification (3 to 10 Weeks) | Adult Cat Standard | Why the Difference Matters |
|---|---|---|---|
| Entry Wall Height | 1.5 to 2.5 inches (low-entry) | 5 to 8 inches (standard wall) | Tiny legs cannot climb high plastic walls; kittens will eliminate right outside |
| Box Enclosure | 100% open-top tray | Open or hooded | Enclosed hoods trap strong ammonia scents and create scary dark tunnels |
| Box Dimensions | 12 × 18 inches minimum | 18 × 24 inches or larger | Provides ample turning room without feeling like an endless maze |
| Litter Substrate | Non-clumping paper pellets or herbal clay | Clumping sodium bentonite clay | Ingestion of clumping clay causes fatal intestinal blockages in young kittens |
| Litter Depth | 1 to 1.5 inches shallow layer | 2 to 3 inches deep layer | Deep litter causes unstable footing; kittens sink and feel insecure |
Box Dimensions & DIY Low-Entry Options
A four-week-old kitten stands only three inches tall at the shoulder. Expecting them to scramble over a six-inch plastic rim is like asking a human toddler to climb a four-foot fence every time they need the restroom.
If commercial low-entry kitten pans are unavailable, you can build an effective DIY training box from what you already have. A clean metal baking sheet or aluminum roasting pan works immediately, with its short lip and wide floor. A standard plastic storage container becomes a kitten pan when you cut a two-inch entry doorway into one side with heavy-duty shears and smooth the raw edges with duct tape. Even the sturdy lid of a cardboard boot box, lined with a plastic garbage bag, will do the job for the short training period.
Open-Top vs. Covered Boxes
Always use an open-top box during initial training. Hooded or covered litter boxes trap concentrated ammonia vapors that irritate delicate kitten respiratory tracts, and their restricted sightlines make a cautious kitten feel trapped. Open trays provide 360-degree visibility, helping kittens feel secure while they are at their most vulnerable.
Location and Territory Rules
Place the litter box in a quiet, easily accessible corner of your kitten’s primary room, and keep a few placement rules in mind. Cats refuse to eliminate where they eat, so keep food bowls at least four to five feet away from the litter pan. Avoid noisy spots entirely—a washing machine mid-spin, a buzzing refrigerator, or a slamming exterior door can startle a squatting kitten into bolting before they finish. And because young kittens have short attention spans and tiny bladders, plan on at least one box on every floor of your home once you expand their territory.
The Non-Clumping Rule: Avoiding Ingestion Blockages
Substrate choice is a critical safety consideration for kittens under 10 weeks of age.
Kitten Safety Rule: NEVER use clumping sodium bentonite clay litter for kittens under 10 weeks old.
Young kittens explore every new texture by mouthing and tasting it. Clumping clay litters contain sodium bentonite, an expanding mineral agent designed to form hard, tight masses when exposed to moisture.
If a curious kitten ingests clumping granules—either by licking dusty paws after digging or eating stray grains directly—the clay absorbs stomach fluids and expands up to 15 times its original volume. This forms an impenetrable concrete-like mass in the stomach and intestines, resulting in fatal gastrointestinal obstruction that requires emergency surgery.
Instead, select safe, non-clumping substrates. Pelletized recycled paper is highly absorbent and virtually dust-free, and it is safe if swallowed in tiny quantities. Compressed wood pellets are natural pine that dissolves into sawdust when wet rather than clumping. Unscented non-clumping clay is the coarse, traditional option that absorbs liquid without forming hard lumps. Herbal kitten attract litters are natural, non-clumping grain litters infused with pet-safe herbal attractants that draw kittens in by scent.
Explore our full breakdown of safe options in our guide to the best cat litter for kittens.
Step-by-Step Litter Training Process
Follow this reliable 4-step sequence to train your kitten in just a few days.
Step 1: Restrict Territory to a Single Kitten-Safe Room
When bringing a new kitten home, confine them to a small, warm, puppy-proofed room—such as a spare bathroom or nursery—for their first week. An entire house is overwhelming; a kitten playing in the living room will forget where the bathroom is and have an accident behind the sofa. Keeping them in a single room guarantees the litter box is always within eye line.
Step 2: The “Post-Meal & Post-Nap” Placement Protocol
Kittens operate on a predictable biological rhythm driven by the gastrocolic reflex. Eating or drinking stimulates rapid peristalsis in the lower gastrointestinal tract, creating an urge to defecate 10 to 15 minutes after a meal. Similarly, waking from a long sleep relaxes the bladder sphincter, prompting urination.
Take advantage of these biological windows. Place the kitten directly into the box 10 to 15 minutes after every single meal, when the gastrocolic reflex is at its strongest. Do the same immediately after they wake from a nap, when a full bladder is most likely to empty, and again after a vigorous interactive play session, once exercise has gotten everything moving.
Step 3: The Gentle “Paw-Pawing” Digging Technique
Once the kitten is standing in the clean litter, encourage their digging instinct. Gently hold one of their front legs between your thumb and index finger, and gently rake their front paw through the litter in a forward-and-back scratching motion two or three times.
Hearing the scratching sound and feeling the loose granules between their toe beans almost immediately triggers the brain’s elimination script. Step back and give the kitten space to sniff, turn around, and squat.
Step 4: Praise and Calm Confirmation
When the kitten successfully urinates or defecates, offer quiet verbal praise (“Good kitty”) and a gentle stroke behind the ears once they step out of the box. Never startle them with loud cheering or sudden movements while they are inside the box. Zero punishment or scolding should ever take place near the litter area.
Special Guide: Litter Training Feral, Orphaned, or Stray Kittens
Kittens rescued from outdoor colonies, barns, or alleys have never seen commercial litter. They are accustomed to eliminating in loose garden soil, damp leaves, sand, or mulch.
To train an outdoor kitten smoothly, start with the soil transition method: fill the low-entry litter box with two inches of non-clumping paper or clay litter, then sprinkle a half-inch layer of clean, chemical-free potting soil or garden dirt over the top so the familiar earthy smell signals that this is an appropriate bathroom site. Over the next five to seven days, gradually reduce the amount of dirt during daily cleanings until the kitten uses 100 percent commercial litter. It also helps to retain a scent marker early on—when scooping, leave one small dry piece of stool in the corner for the first 48 hours so the localized scent confirms the box as their territory.
For kittens transitioning dietary routines at the same time, coordinate your setup with our guide on how to wean kittens.
Handling Accidents: The Enzymatic Reset Protocol
Accidents are a normal part of developmental learning. How you handle accidents determines whether they remain isolated mistakes or become chronic problem areas.
Critical Rule: NEVER rub a kitten’s nose in waste, yell, or strike them. Physical punishment causes fear, destroys trust, and teaches the kitten to hide waste in dark closets or under beds.
When an accident occurs, follow the enzymatic reset protocol:
1. Blot and Clean with Enzymatic Cleaners Only
Cat urine contains urea, urochrome, and uric acid salt crystals. Standard household bleach, ammonia sprays, or carpet soaps clean the surface stain but leave the uric acid crystals intact. To a cat’s sensitive nose, the spot still smells like a toilet. More critically, ammonia-based cleaners chemically mimic the nitrogen in cat urine, actually attracting the kitten back to the same spot.
Saturate the accident spot with a specialized enzymatic pet cleaner. The live enzymes break down the uric acid molecules into harmless, odorless carbon dioxide and water.
2. Move the Scent to the Box
If the kitten had a solid bowel movement on the floor, pick up the stool with a paper towel and place it directly into the litter box rather than flushing it away. Bring the kitten over to the box, let them see and sniff the stool inside, and gently perform the “paw-pawing” motion. This reinforces where that scent belongs.
3. Temporarily Block the Accident Site
If the kitten repeatedly targets a specific corner, place an extra litter box directly over that spot. Once the kitten uses the box reliably for a week, slide the box a few inches each day toward your preferred permanent location.
For adult cats developing sudden house-soiling behaviors, see our troubleshooting guide on cats not using the litter box.
When Elimination Troubles Signal Medical Issues
While occasional misses are normal during the first week, certain elimination symptoms indicate serious veterinary emergencies. A kitten who visits the box repeatedly, cries in pain, or strains without producing urine may have a life-threatening urethral obstruction, urinary tract infection, or severe constipation. Chronic watery diarrhea causes rapid dehydration and can stem from intestinal parasites such as coccidia or roundworms, while blood in the urine or dark, tarry stools point to internal inflammation or a parasite burden that needs prescription medication. Contact your veterinarian immediately if you observe any of these signs.
If you notice any of these signs, consult your veterinarian. This article is for informational purposes and does not replace professional veterinary advice.
For overall developmental timelines, review our week-by-week kitten development guide.
Frequently Asked Questions
How long does it take to litter train a kitten?
Most kittens learn to use the litter box within two to four days of consistent guidance. Because digging in loose substrate is an innate feline instinct rather than a learned trick, placing them in the box after meals and naps rapidly solidifies the habit.
Why is my kitten playing or sleeping in the litter box?
Young kittens frequently nap or play in the litter box because it feels like a secure, familiar nest box with cozy low sides. This behavior is harmless and fades naturally by 6 to 8 weeks as the kitten matures and establishes separate sleeping and elimination territories. Ensure you provide cozy fleece beds outside the box.
Can a 4-week-old kitten use clumping clay litter?
No. Four-week-old kittens should never have access to clumping clay litter. Kittens explore their environment by tasting loose granules; swallowed clumping clay expands in the stomach and forms life-threatening bowel blockages. Use non-clumping paper pellets, wood pellets, or herbal litter until at least 10 weeks of age.
What should I do if my kitten keeps pooping in the corner?
If your kitten repeatedly targets a specific floor corner, clean the area thoroughly with an enzymatic cleaner to eliminate invisible uric acid scent markers. Place a low-entry litter box directly in that corner. Once they use it consistently, gradually move the box a few inches per day toward your desired spot.